Gradio Tutorial: Creating Interactive ML Demos
I’m a visual thinker and learner, so finding Gradio was a game-changer.
With minimal code, you can launch a web-based UI in your browser — with both a local and publicly shareable link (active for up to 72 hours). This is especially useful when you want to showcase your machine learning model to teammates or stakeholders.
This tutorial shows you how to create a multi-tab interactive interface using Gradio — each tab dedicated to a different AI task. We’ll build four mini-demos. Each task is self-contained, but when combined into a multi-tabbed Gradio app, they feel like a complete ML product prototype.
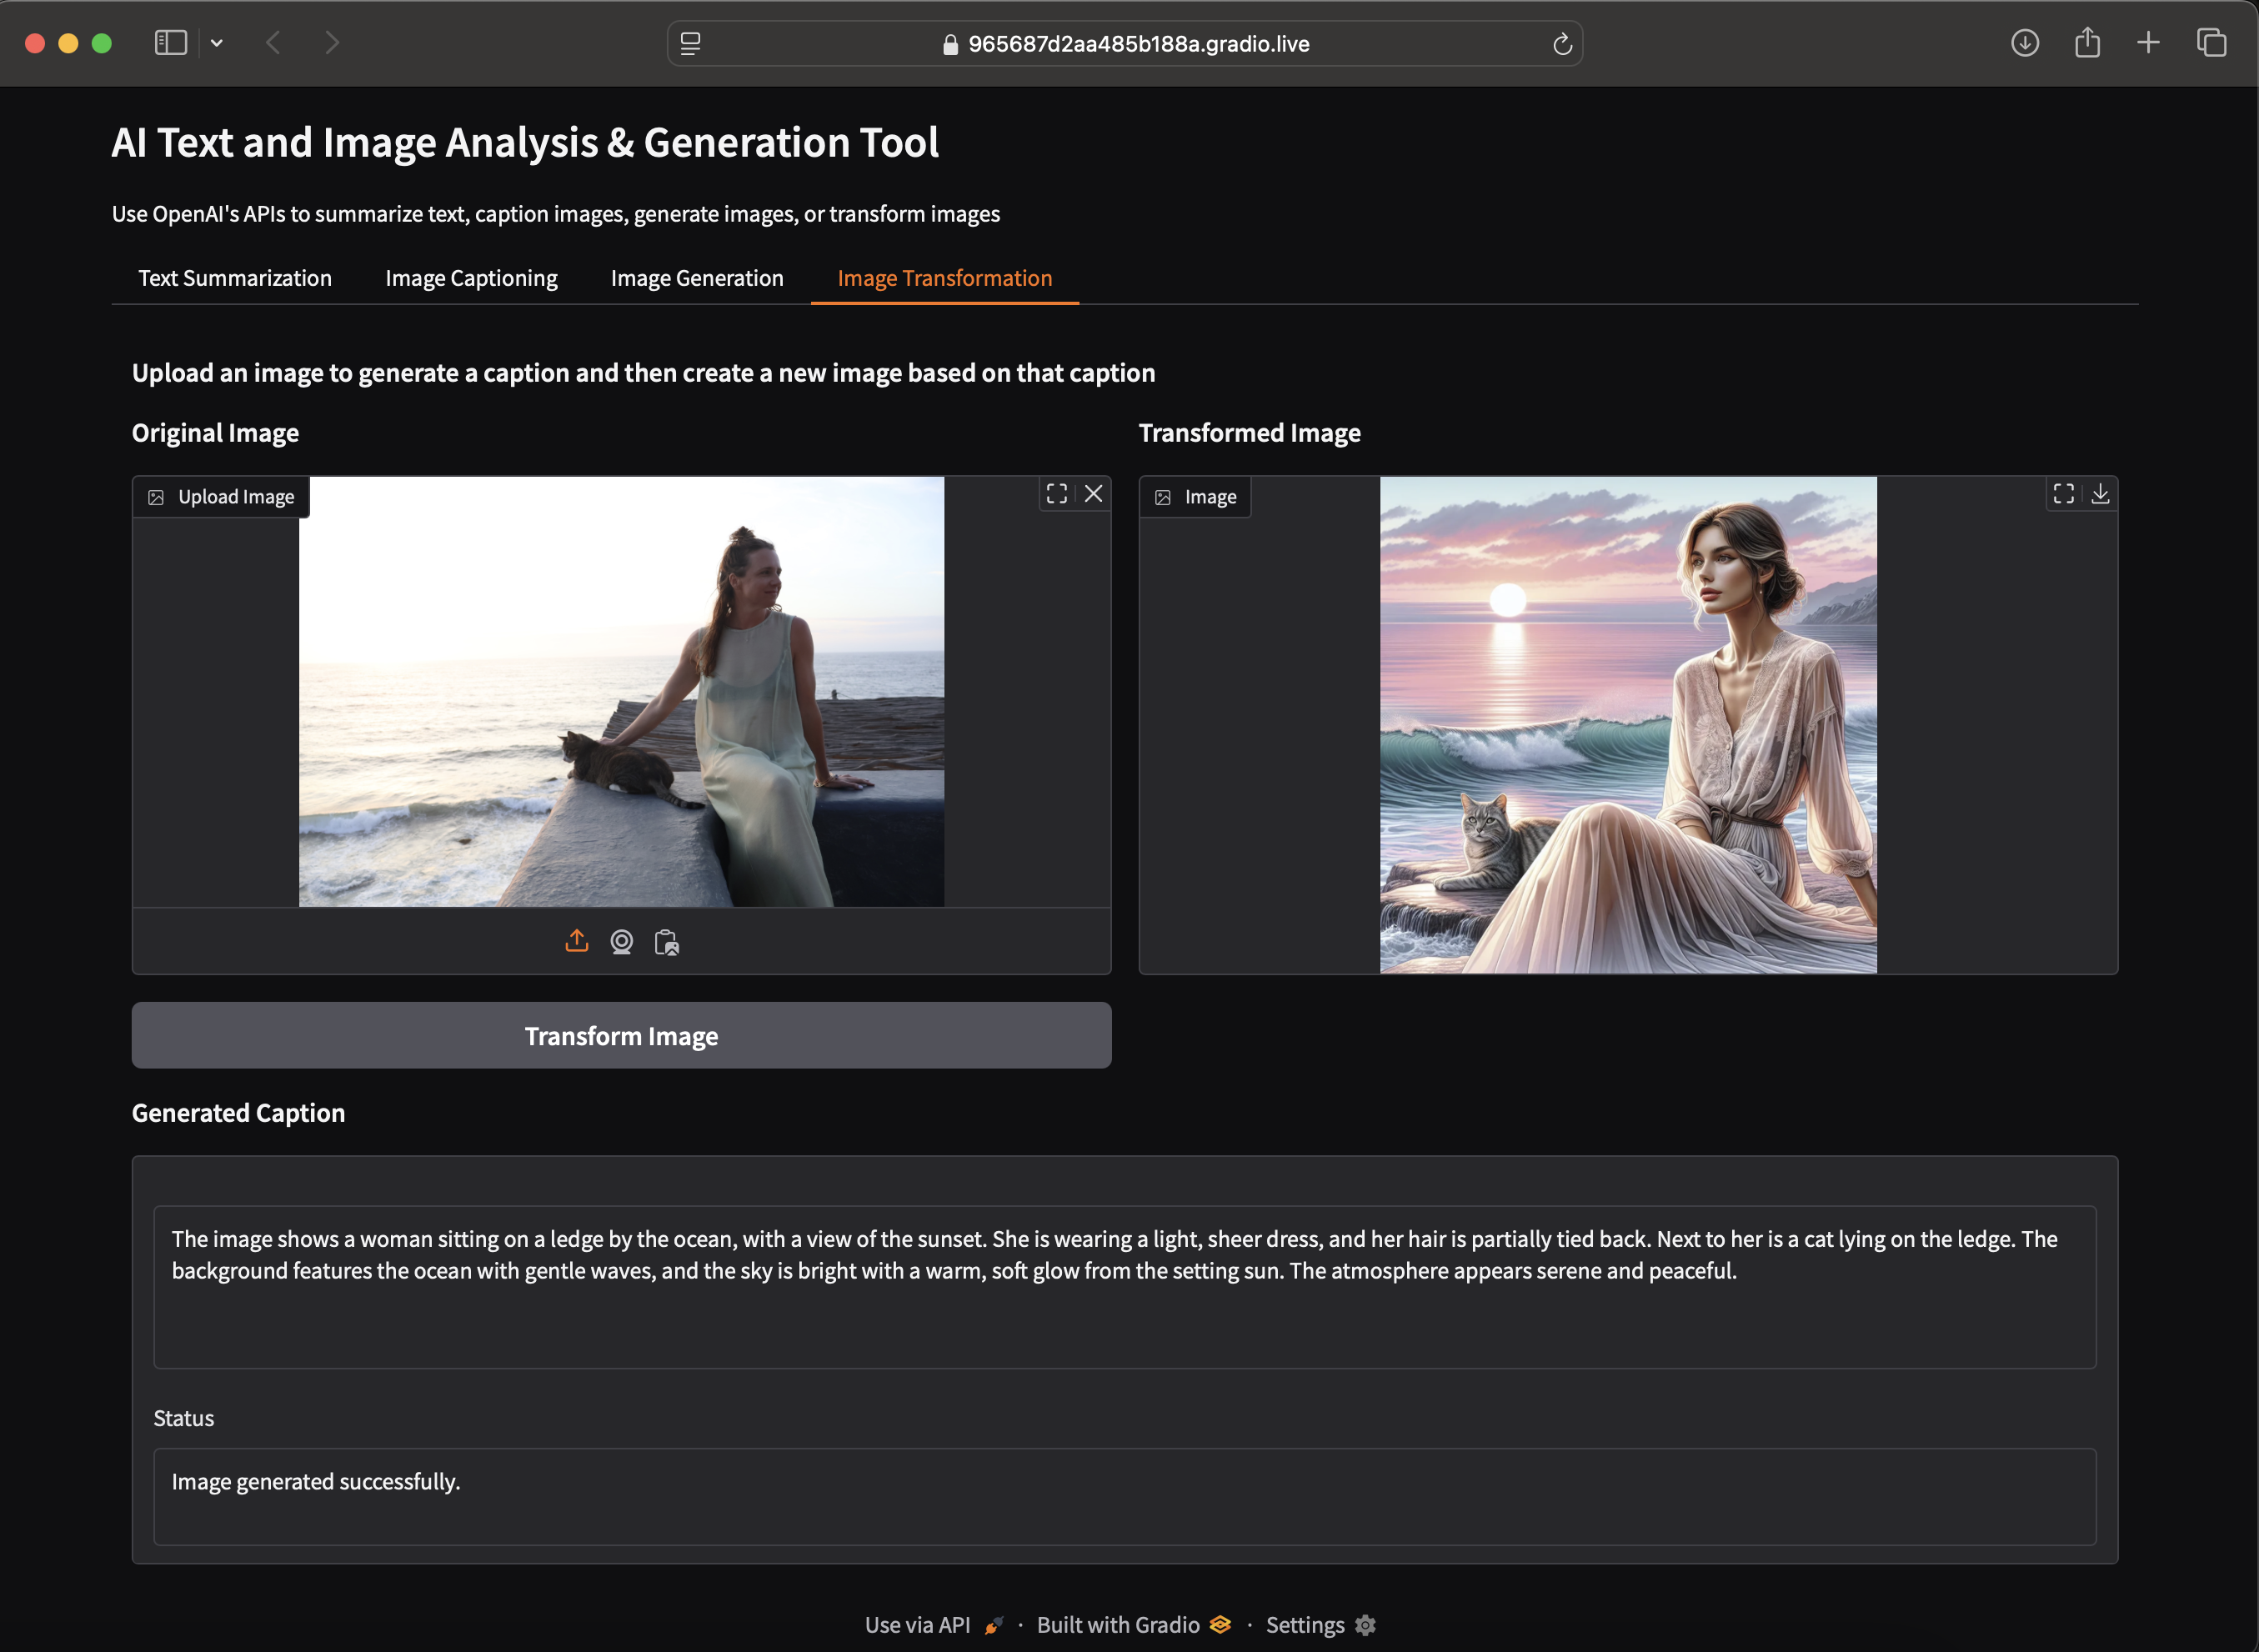 Uploaded image : An impromptu photoshoot with friends for my sustainable clothing label kamli.studio in Sayulita. A local stray cat decided to join Erika mid shoot ^_^
Gradio’s layout API is incredibly intuitive. Here’s the base structure we use:
1
2
3
4
5
6
7
8
9
10
11
12
with gr.Blocks() as demo:
    # Tabs
    with gr.Tabs():
        with gr.TabItem("Tab 1"):
            # ...

    # Rows and columns
    with gr.Row():
        with gr.Column(scale=2):  # Takes 2/3 of width
            # ...
        with gr.Column(scale=1):  # Takes 1/3 of width
            # ...
- Use
Tabswhen you have multiple tasks and want to keep the interface clean. - Use
RowandColumnto manage layout spacing and organize components horizontally and vertically.
Plugs in neatly with any API:
1
2
3
4
5
6
7
8
9
10
11
12
13
14
15
import gradio as gr
from openai import OpenAI
from dotenv import load_dotenv

# Load API key
load_dotenv()
client = OpenAI()

# Create interface
with gr.Blocks(title="AI App") as demo:
    gr.Markdown("# My AI App")
    # Components go here...

# Launch app
demo.launch(share=True)  # Creates a shareable link
To jump directly to the notebook (updated March 2025): GitHub Repo
The tutorial creates the following 4 tasks :
- Text summarizer
- Image captioner
- Text-to-image generator
- Image transformer (upload → caption → new image)
Setup
1
pip install gradio openai python-dotenv pillow requests
Create a .env file so you can share the API key across tasks:
1
OPENAI_API_KEY=your-api-key-here
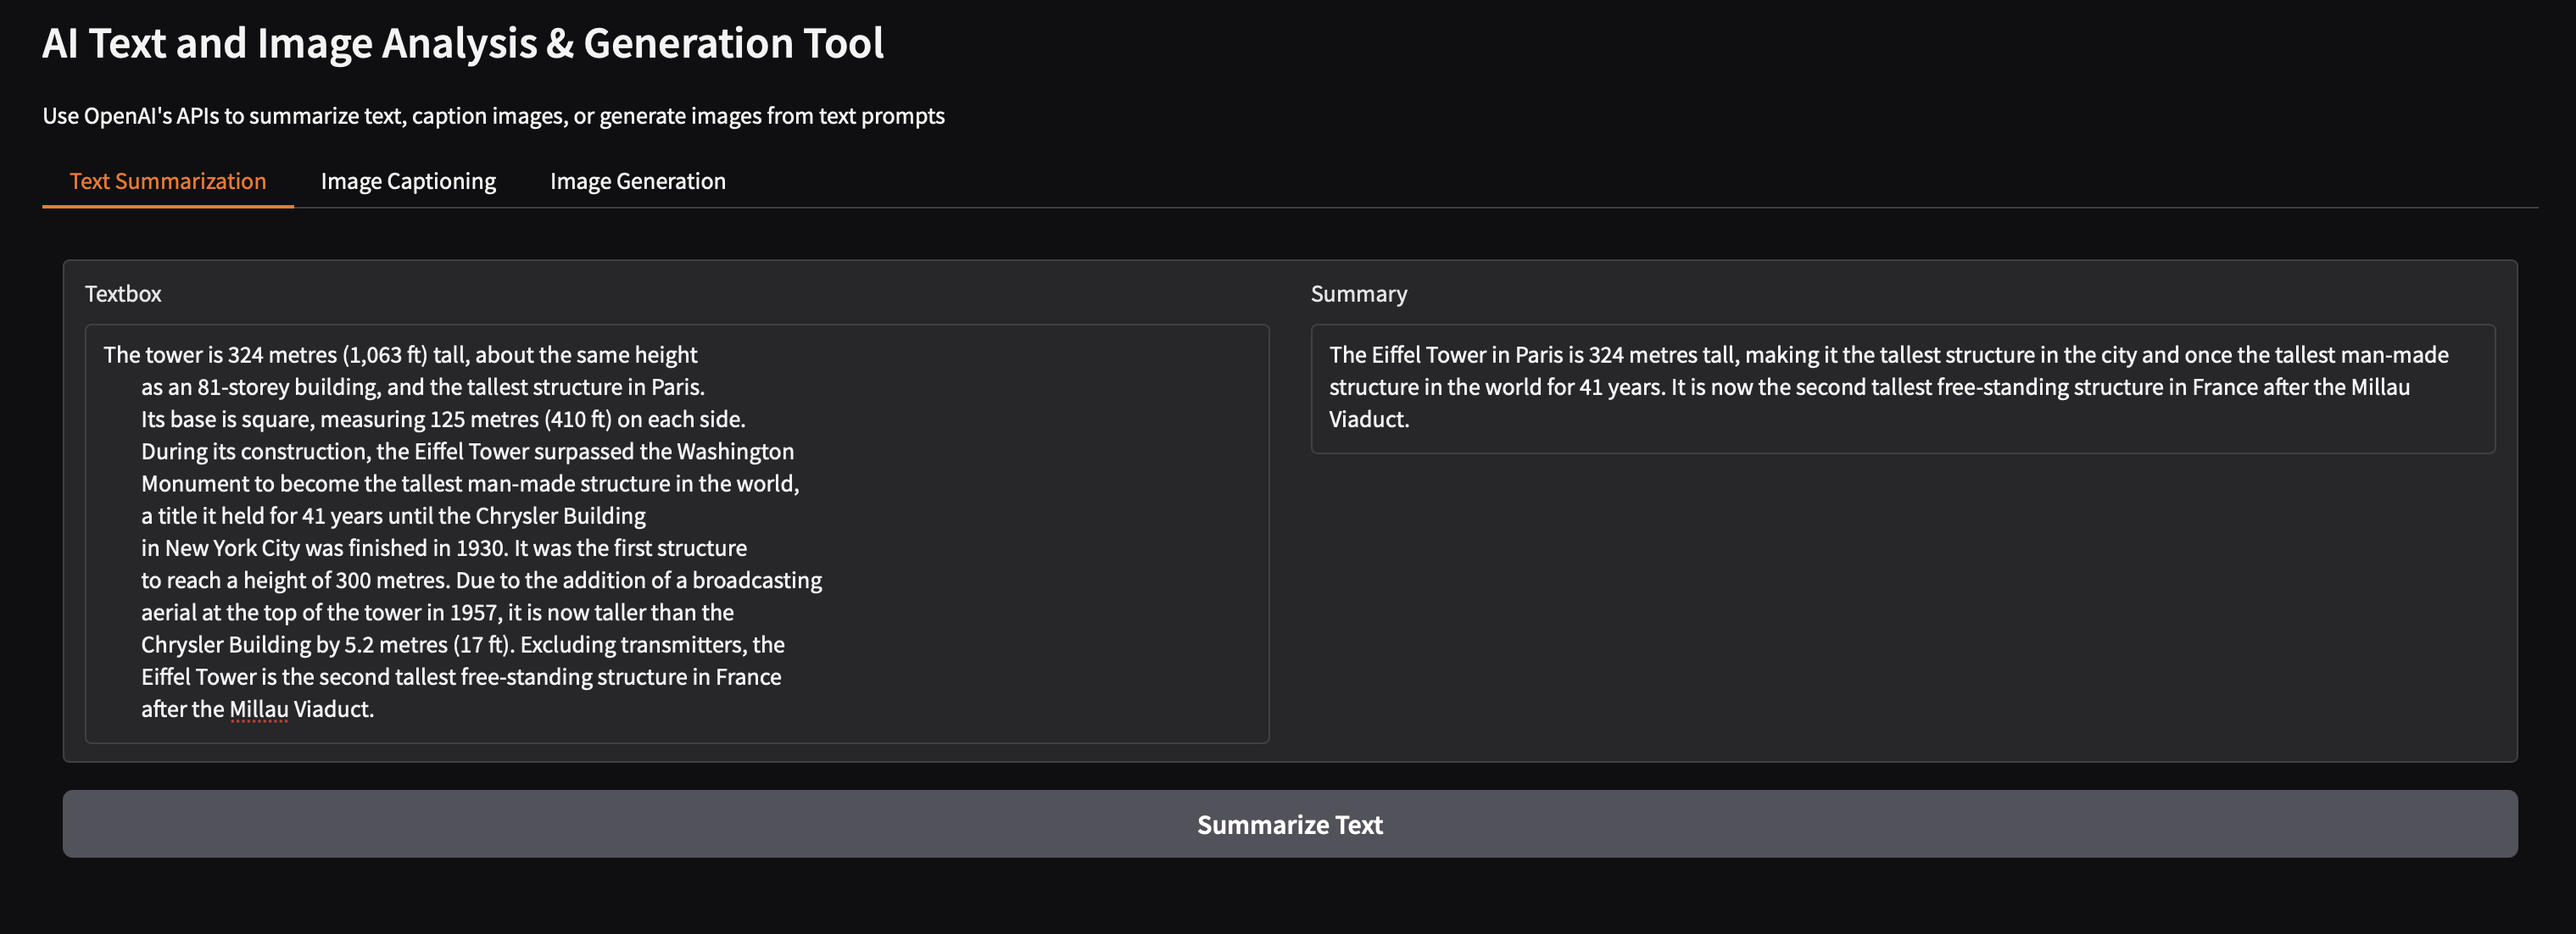
Task 1: Text Summarization
1
2
3
4
5
6
7
8
9
10
11
12
13
14
15
16
17
18
19
20
21
def summarize(text):
    """Summarize text using OpenAI"""
    response = client.chat.completions.create(
        model="gpt-3.5-turbo",
        messages=[
            {"role": "system", "content": "Summarize this text:"},
            {"role": "user", "content": text}
        ],
        max_tokens=150
    )
    return response.choices[0].message.content

# Add to our interface
with gr.TabItem("Text Summarization"):
    text_input = gr.Textbox(lines=5, placeholder="Paste text here...")
    text_output = gr.Textbox(label="Summary")
    gr.Button("Summarize").click(
        fn=summarize,
        inputs=text_input,
        outputs=text_output
    )
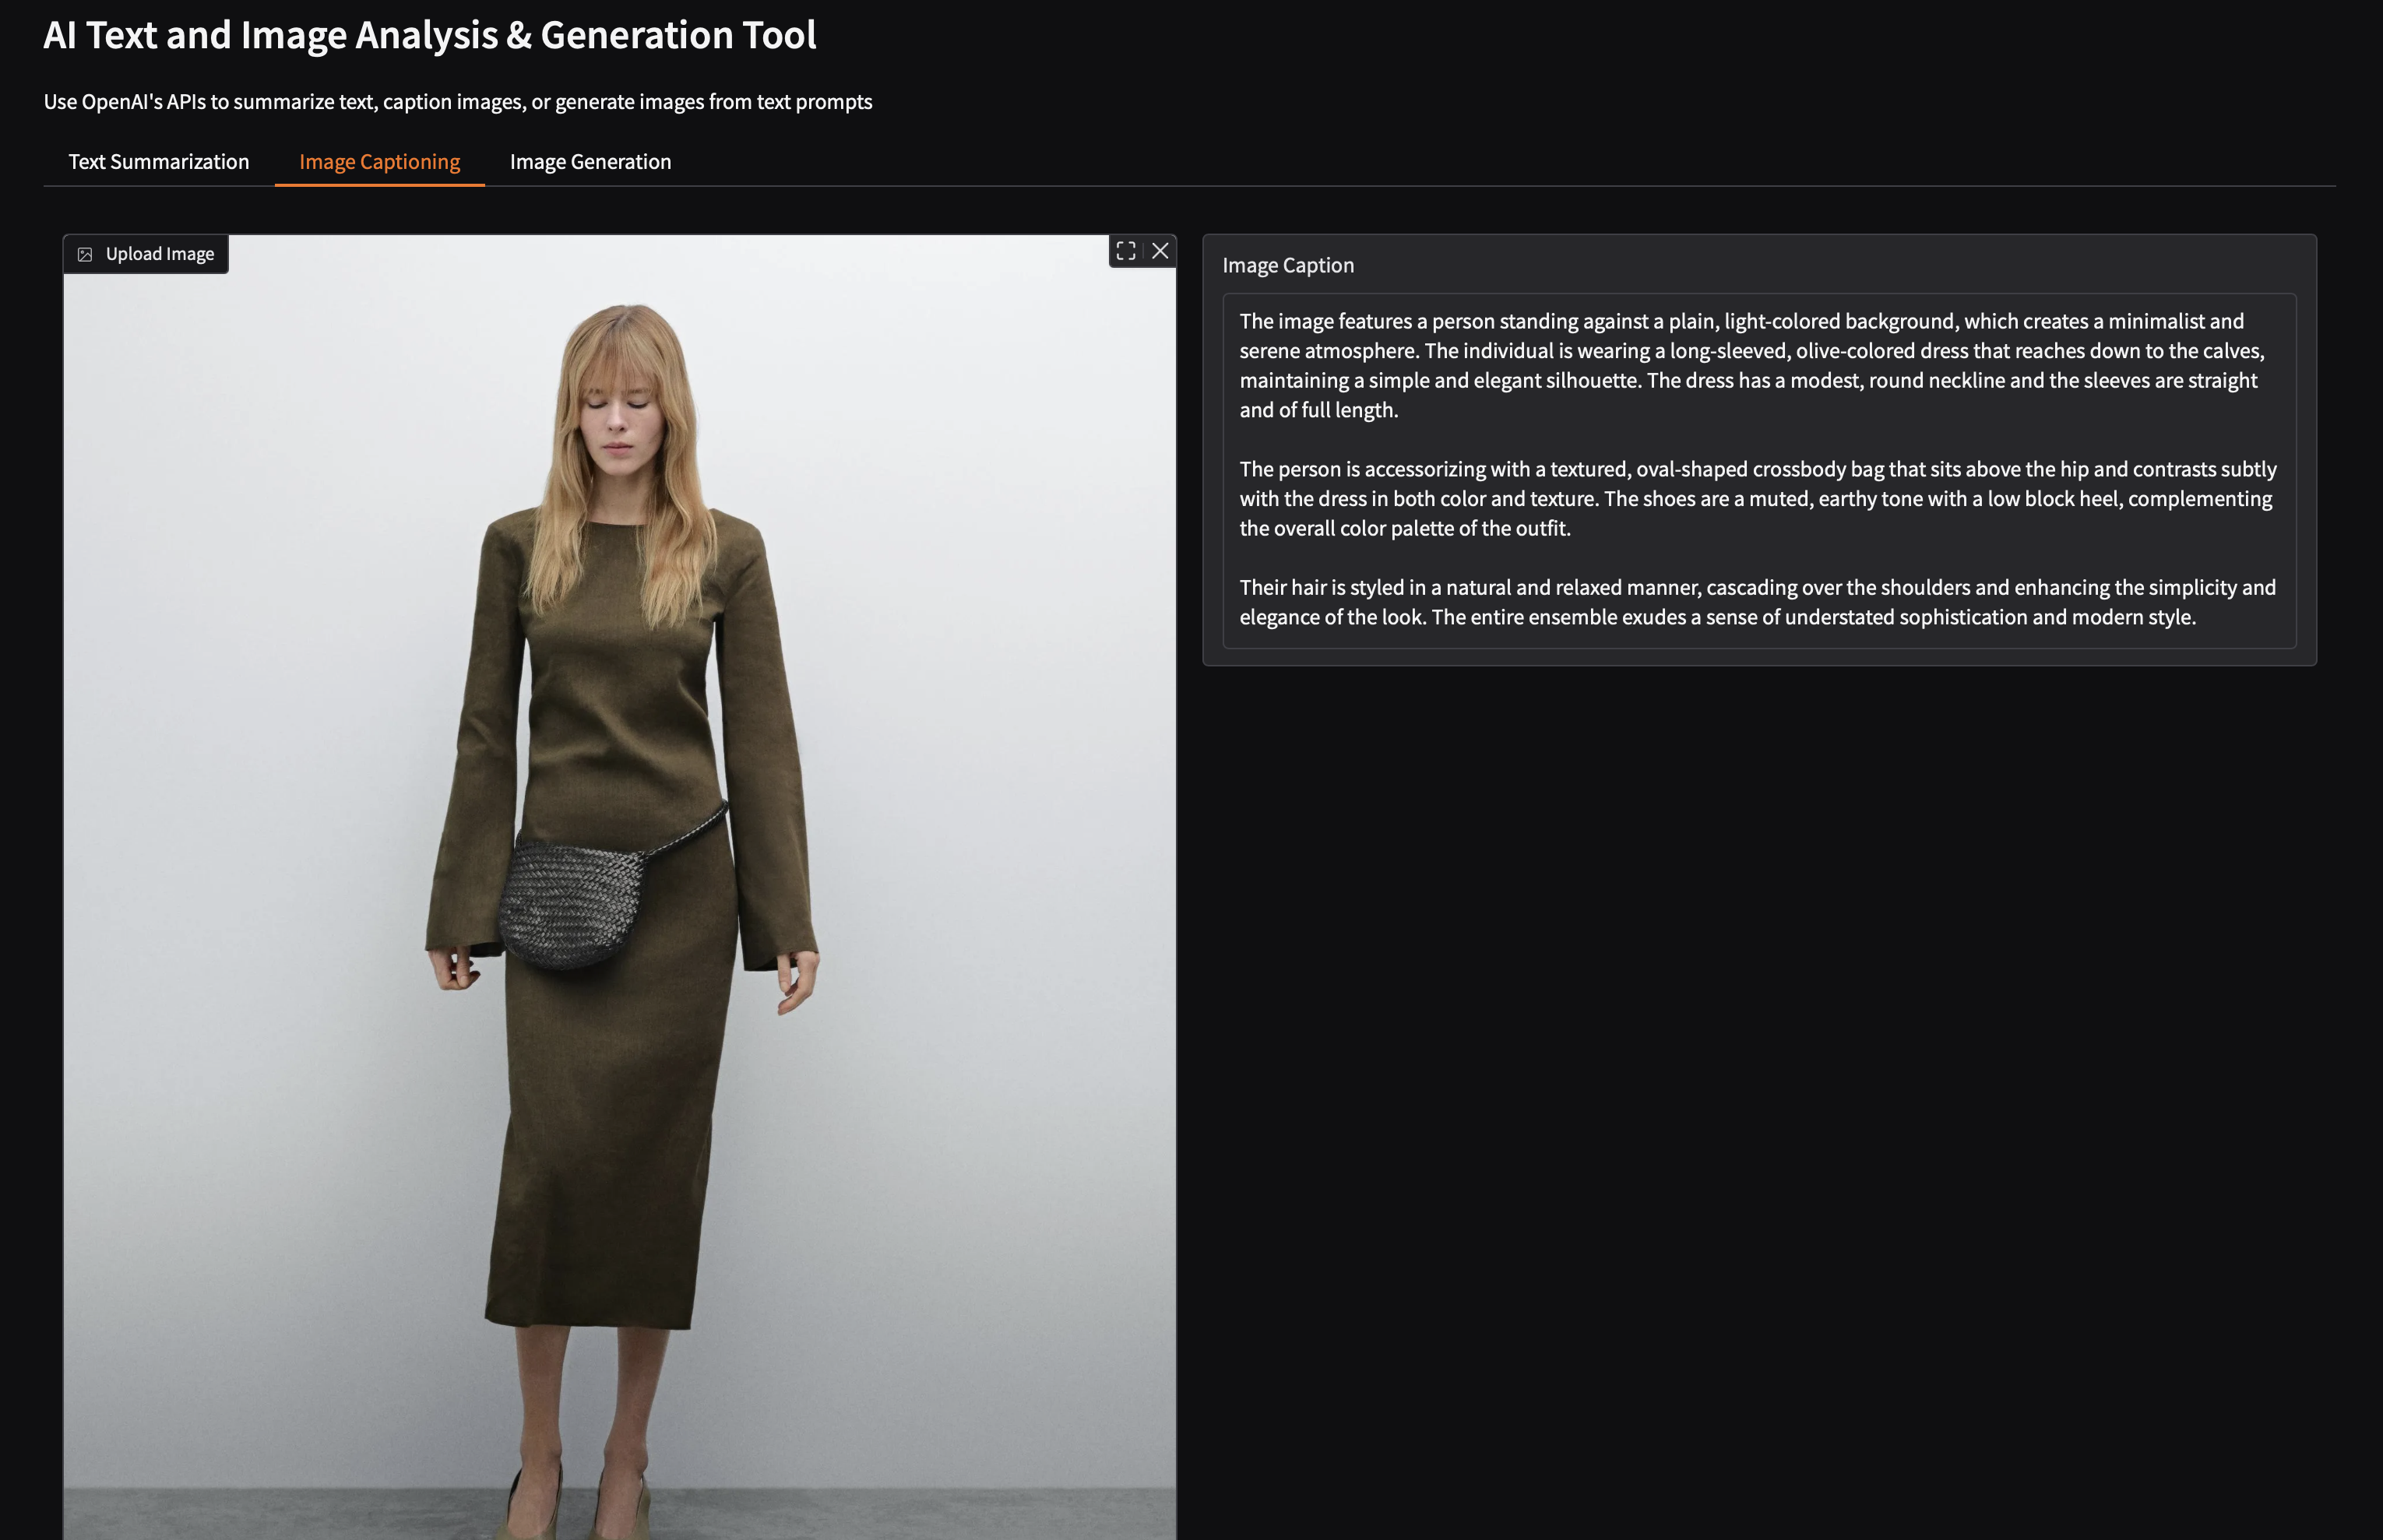
Task 2: Image Captioning
1
2
3
4
5
6
7
8
9
10
11
12
13
14
15
16
17
18
19
20
21
22
23
24
25
26
27
28
29
def caption_image(image):
    """Generate description of an image"""
    # Convert image to base64
    byte_stream = io.BytesIO()
    image.save(byte_stream, format='JPEG')
    base64_image = base64.b64encode(byte_stream.getvalue()).decode('utf-8')

    # Send to OpenAI
    response = client.chat.completions.create(
        model="gpt-4o",
        messages=[{
            "role": "user",
            "content": [
                {"type": "text", "text": "Describe this image:"},
                {"type": "image_url", "image_url": {"url": f"data:image/jpeg;base64,{base64_image}"}}
            ]
        }]
    )
    return response.choices[0].message.content

# Add to interface
with gr.TabItem("Image Captioning"):
    image_input = gr.Image(type="pil")
    caption_output = gr.Textbox(label="Caption")
    gr.Button("Generate Caption").click(
        fn=caption_image,
        inputs=image_input,
        outputs=caption_output
    )
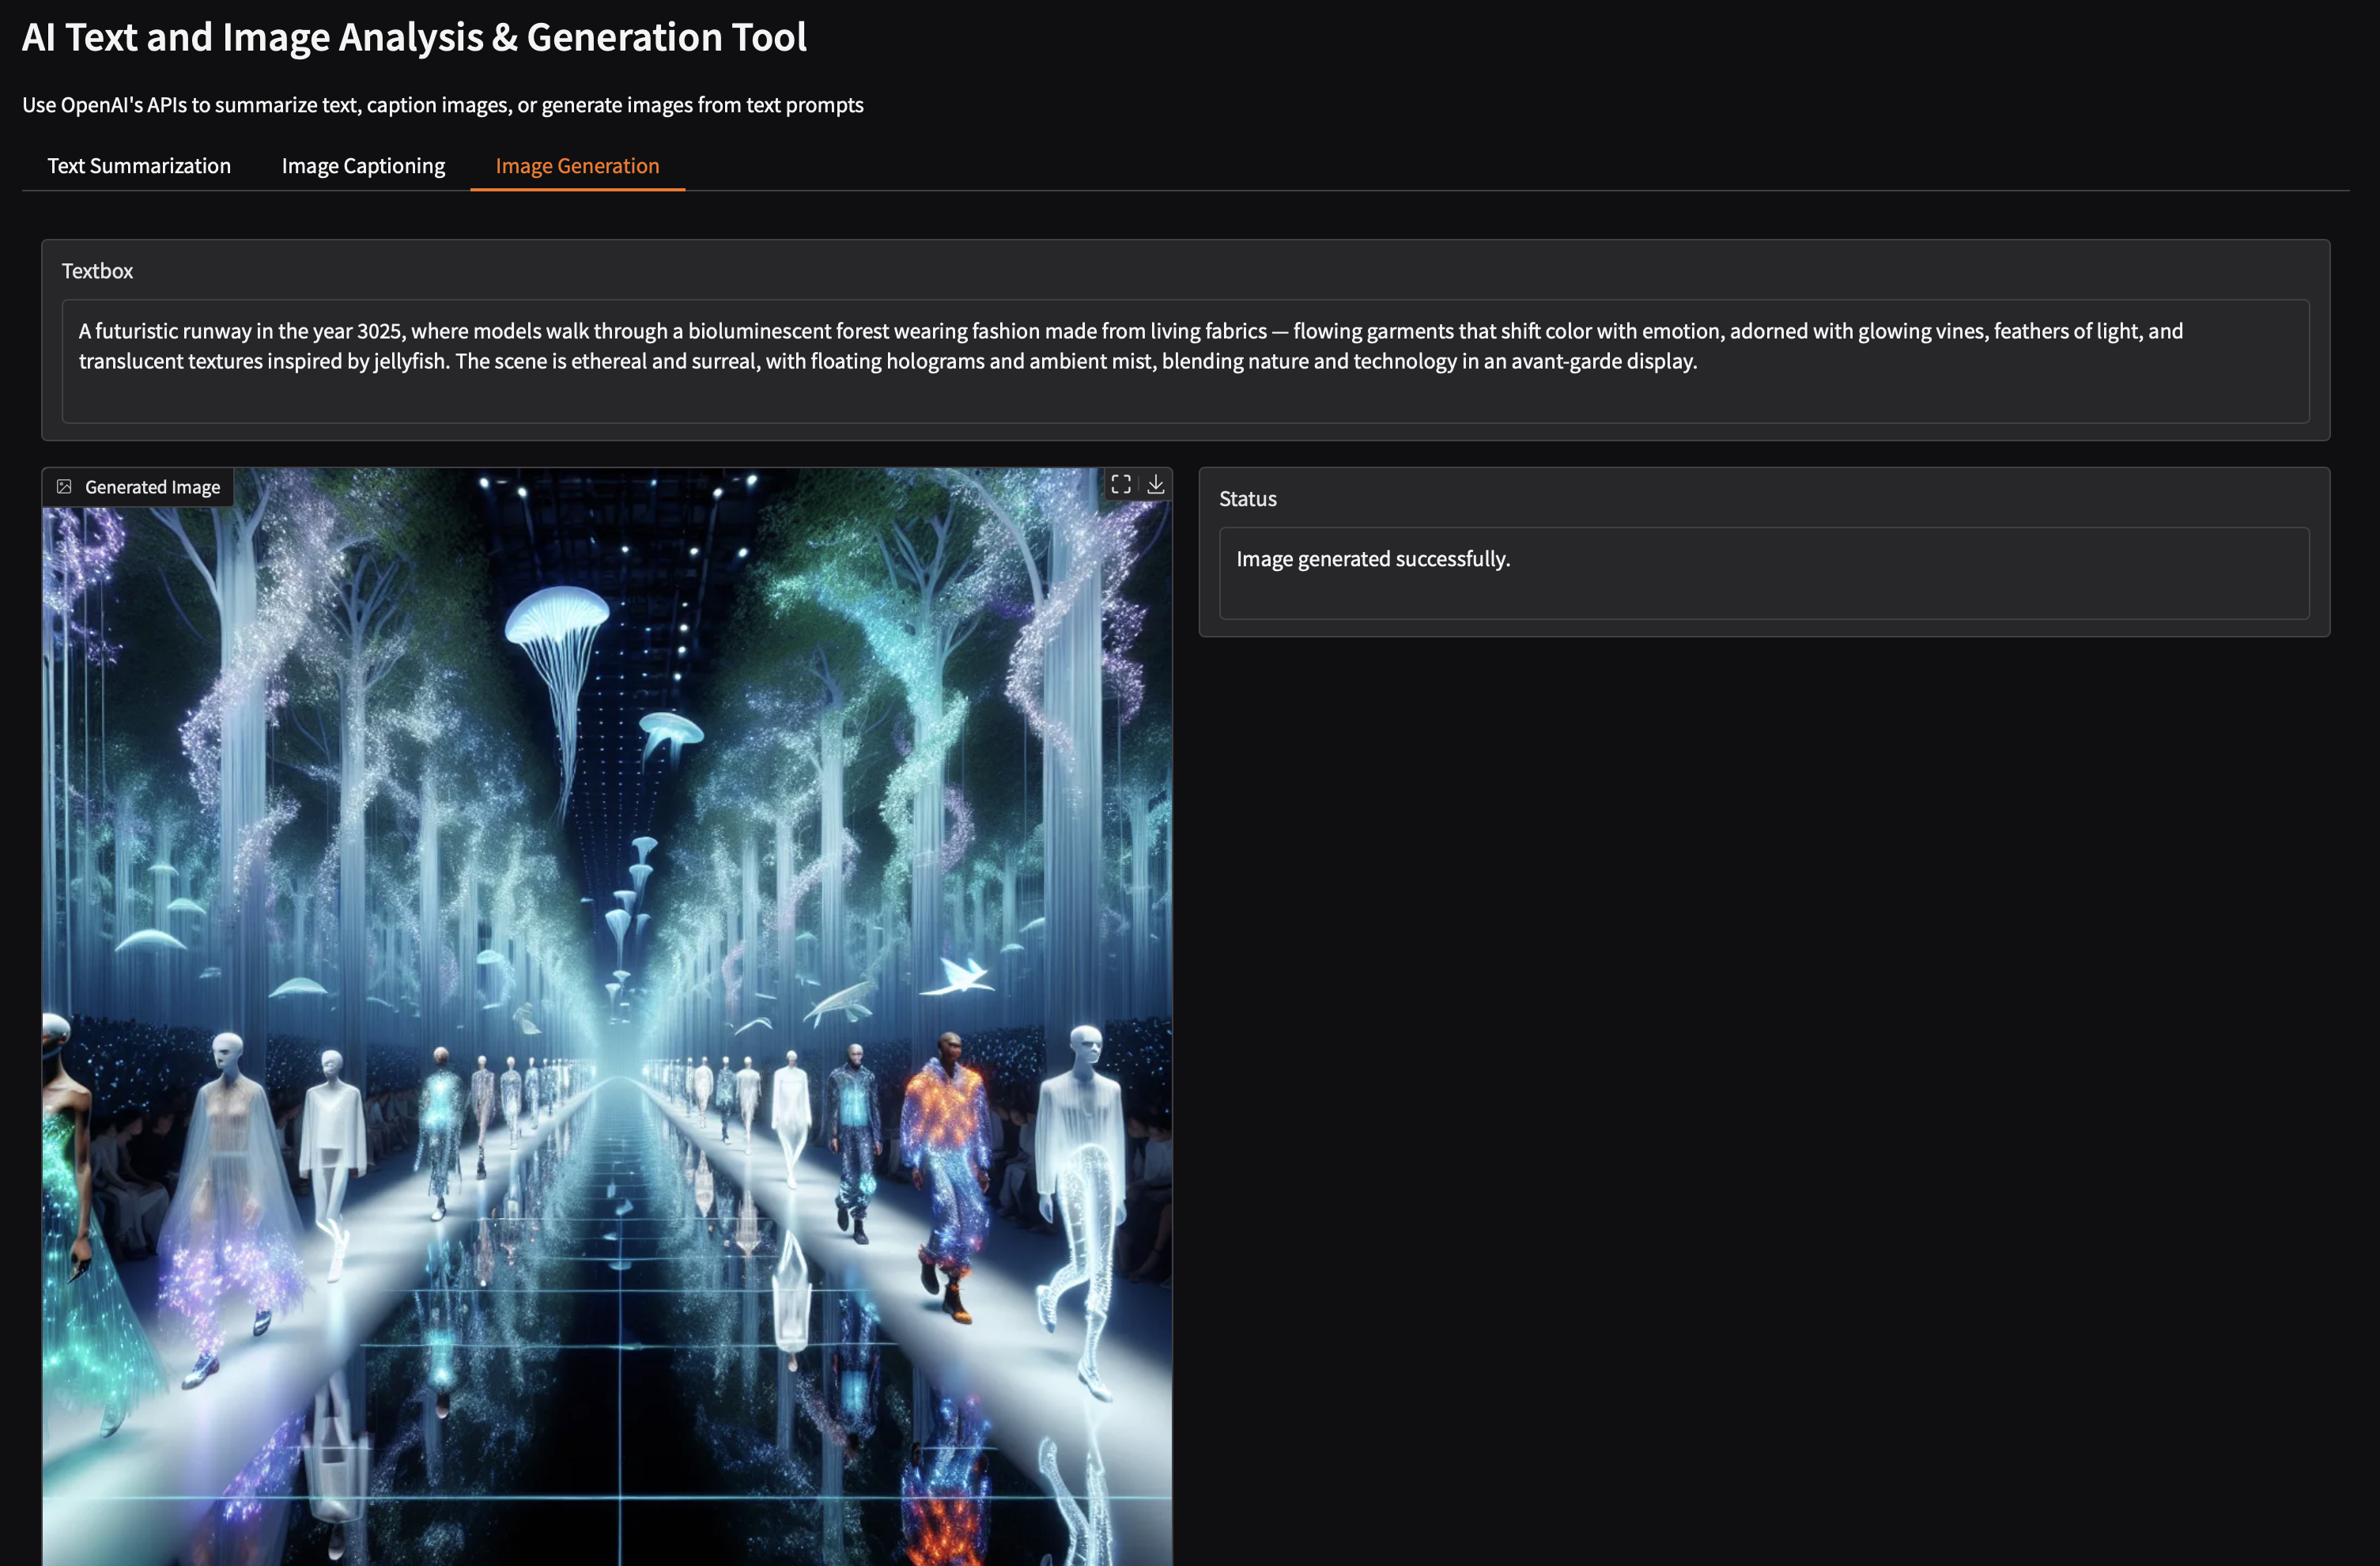
Task 3: Image Generation
1
2
3
4
5
6
7
8
9
10
11
12
13
14
15
16
17
18
19
20
21
22
23
def generate_image(prompt):
    """Create image from text prompt"""
    response = client.images.generate(
        model="dall-e-3",
        prompt=prompt,
        size="1024x1024",
        n=1
    )

    # Download the image
    image_url = response.data[0].url
    image = Image.open(BytesIO(requests.get(image_url).content))
    return image

# Add to interface
with gr.TabItem("Image Generation"):
    prompt_input = gr.Textbox(placeholder="Describe the image...")
    image_output = gr.Image()
    gr.Button("Generate Image").click(
        fn=generate_image,
        inputs=prompt_input,
        outputs=image_output
    )
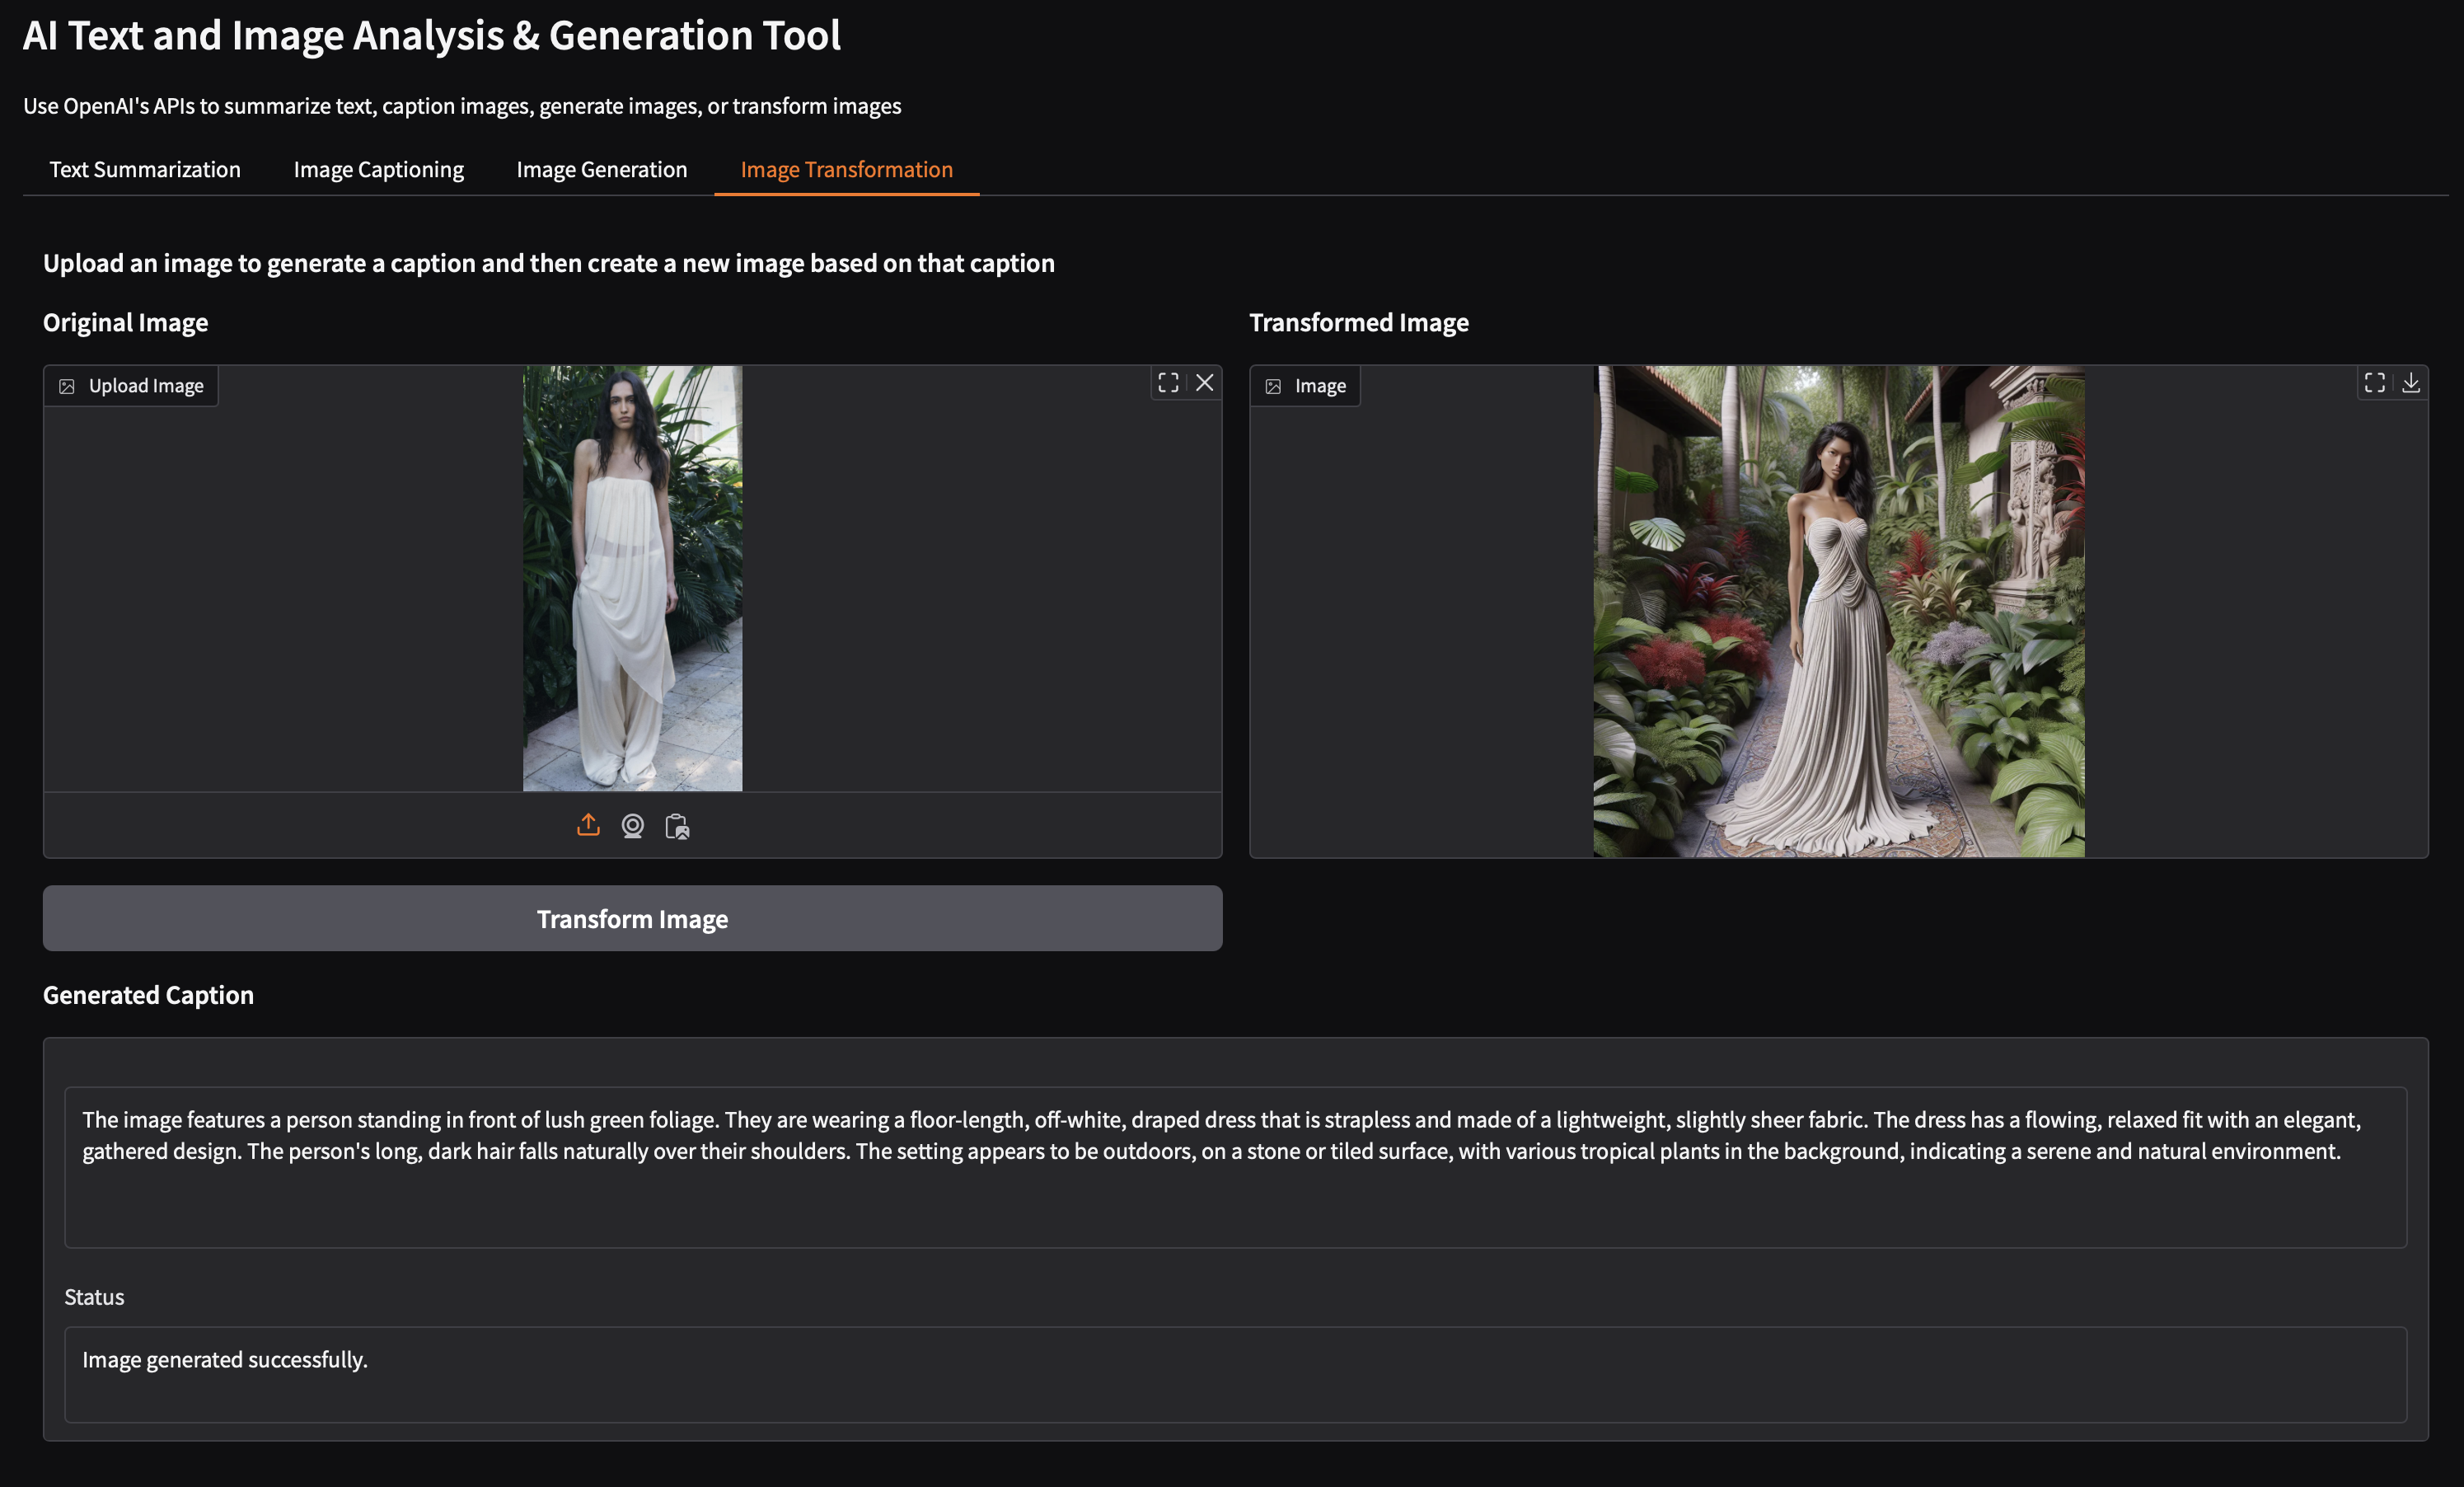
Task 4: Image Transformation
1
2
3
4
5
6
7
8
9
10
11
12
13
14
15
16
17
18
19
20
21
22
23
24
25
26
27
28
29
def transform_image(image):
    """Caption image then generate new image from caption"""
    # Get image description
    caption = caption_image(image)

    # Create new image with style instructions
    style = "Make it look like product photography"
    new_image = generate_image(f"{caption} {style}")

    return caption, new_image

# Add to interface with 2-column layout
with gr.TabItem("Image Transformer"):
    with gr.Row():
        # Left column - input
        with gr.Column():
            input_image = gr.Image(label="Upload Image", type="pil")
            transform_btn = gr.Button("Transform")

        # Right column - output
        with gr.Column():
            output_image = gr.Image(label="Transformed")
            caption_text = gr.Textbox(label="Generated Caption")

    transform_btn.click(
        fn=transform_image,
        inputs=input_image,
        outputs=[caption_text, output_image]
    )